Underwater photography is a magical way to capture the beauty of the ocean’s vibrant life, from colorful coral reefs to playful marine creatures. But getting the perfect shot requires more than just pointing your camera and clicking. Whether you’re a beginner or looking to level up your skills, these essential tips will help you get the most stunning underwater photos.
Invest in the Right Equipment
Choosing the right camera is the foundation of great underwater photography. For beginners, a waterproof camera that works straight out of the box is often the easiest choice, since there’s no complicated housing to worry about. More advanced photographers sometimes use a waterproof housing to convert a regular above-water camera into an underwater-ready rig. And for deeper dives, a protective housing is generally required to ensure your camera stays dry under pressure.
Accessories like strobes, underwater lights, and lens ports can help restore colors that fade with depth, while filters correct the blue and green tint that water often casts over your images. Before your dive, practice with your gear in shallow water so you feel comfortable adjusting settings without distraction. For more tips on the essential gear for your snorkeling adventures, check out our Snorkel Gear Guide.
Naturalist Favorites: Our team often recommends these reliable options for beginners and experienced divers alike:
- GoPro – great for video and versatile quick shots
- DJI – also great for video and wide-angle photos
- Insta360 – ideal for immersive wide-angle video
- Olympus TG7 – compact, rugged, and optimized for still photography, especially great at macro photography (for when you find a wonderfully colorful, but tiny, nudibranch)
For a more comprehensive guide to digital underwater cameras, check out Backscatter’s recommendations.
And for extra safety, add waterproof housing to your camera. Be sure to test it beforehand—without the camera inside—by placing a dry tissue in the housing and submerging it to make sure there are no leaks.
Pro Tip: If you plan to shoot both wide-angle and macro images, consider cameras with interchangeable lenses (e.g., DSLR with a housing) or compact cameras with lens ports or adjustable focal lengths (like the Olympus TG7). This flexibility will allow you to capture sweeping reef scenes and tiny critters without compromising quality.

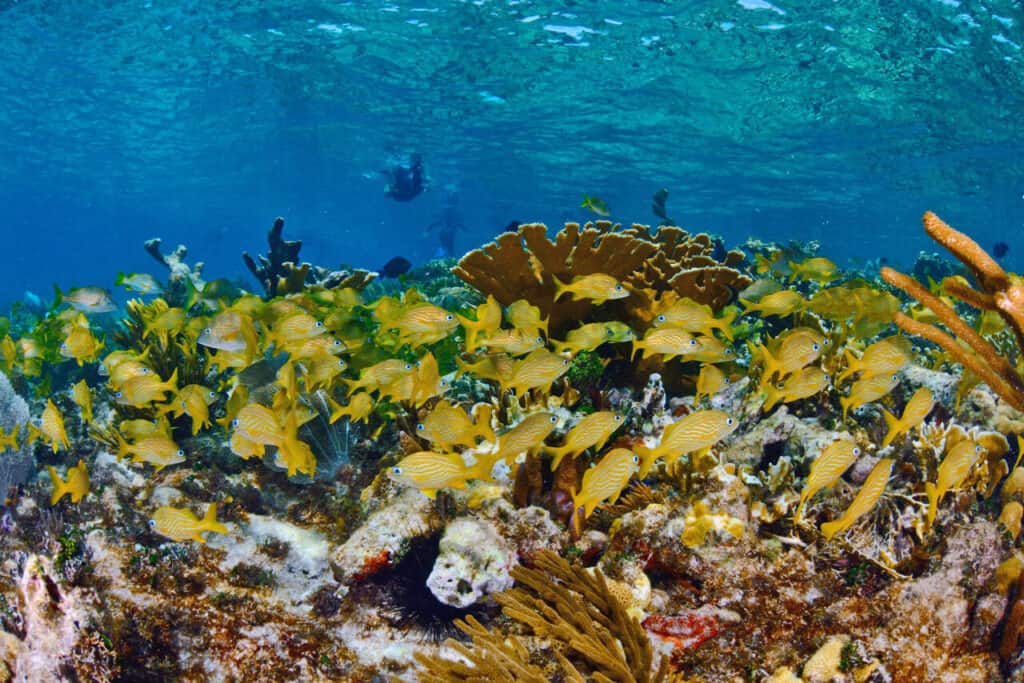
Colorful blue chromis swim above the beautiful reef at Wetar. © Keoki Stender
Get Close to Your Subject (or Go Wide!)
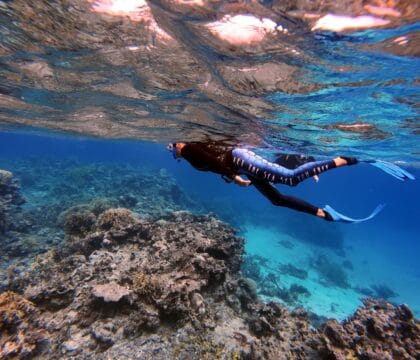
Water scatters light, reducing color, contrast, and sharpness, so getting close to your subject is usually the best way to capture crisp, vibrant shots. Approach slowly and observe natural patterns, especially with shy or fast-moving creatures, to avoid disturbing them.
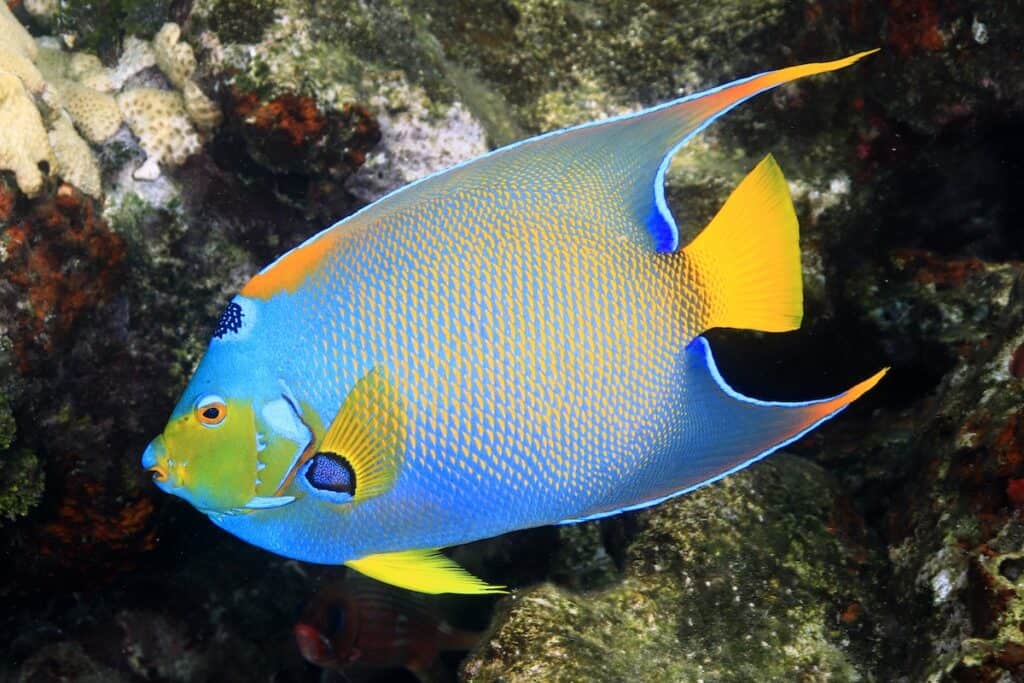

Close-up of a Queen Angelfish (Holacanthus ciliaris) showcasing its vibrant colors and intricate patterns. Photo by Keoki Stender.
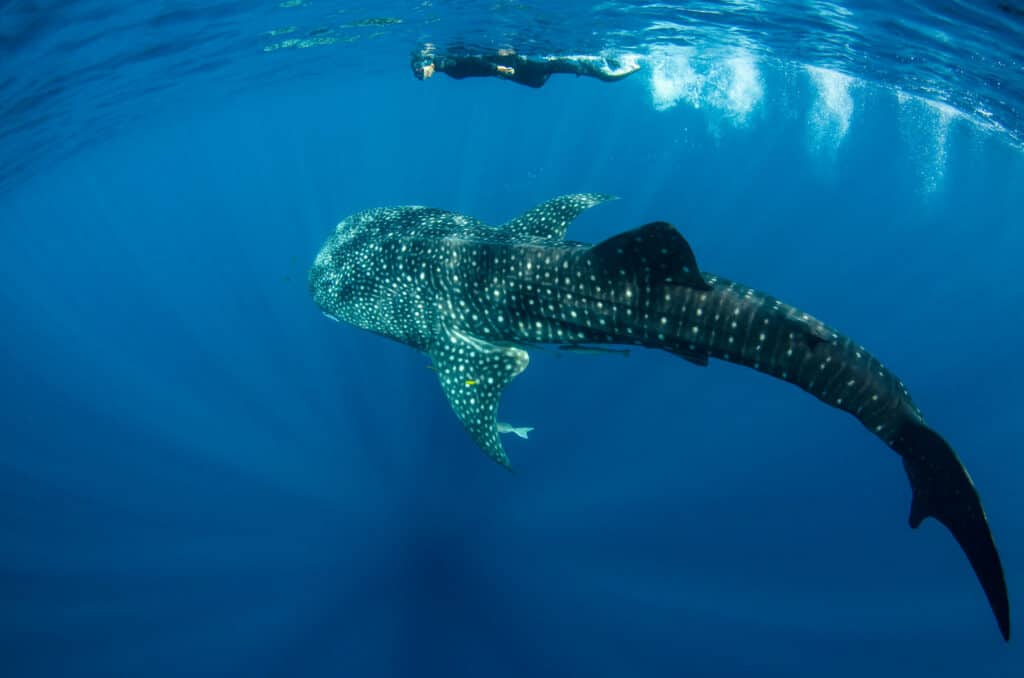
However, for wide-angle photography like capturing expansive coral reefs, schools of fish, or a diver in their environment, you need to balance closeness with perspective. Wide-angle lenses allow you to include more of the scene, but you still want to minimize the amount of water between your camera and the main subject. Getting closer to foreground elements (like coral or rocks) while keeping the background expansive can create dramatic depth and immersive compositions.

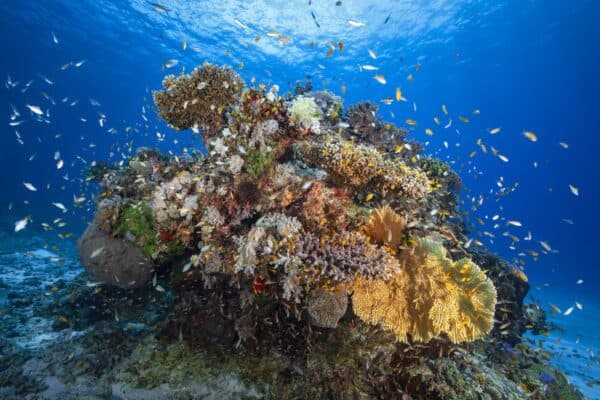
Gaby Barathieu / Ocean Image Bank
→ Pro Tip: For wide-angle shots, positioning and perspective are as important as proximity. Look for lines, shapes, and contrasting colors that lead the viewer’s eye through the scene, and always consider how light filters across the water to enhance depth and vibrancy.
Mind Your Lighting & Color Balance
Lighting and color balance underwater are tricky. Natural light diminishes quickly with depth, and colors start to fade as early as a few feet below the surface. Bright, sunny days in shallow waters are ideal for beginners, as they make natural colors pop.
For deeper dives, consider strobes or an underwater flash to restore color and contrast. Position your light at an angle to avoid flat images or harsh reflections. Understanding how light behaves underwater—how it scatters, softens, and changes color—will dramatically improve the images you capture beneath the surface.
Pro Tip: If you are a beginner, your best results will be in shallow, well-lit water. If using a light, position it at a 45-degree angle to reduce backscatter (floating particles that reflect light). Consider using diffusers for softer illumination and experiment with combining natural and artificial light for richer colors. If you’re using a DSLR or mirrorless camera underwater, a smaller f-stop (larger aperture) lets in more light, allowing faster shutter speeds to freeze moving subjects. Balance your aperture, shutter speed, and strobes to achieve sharper, more colorful images.
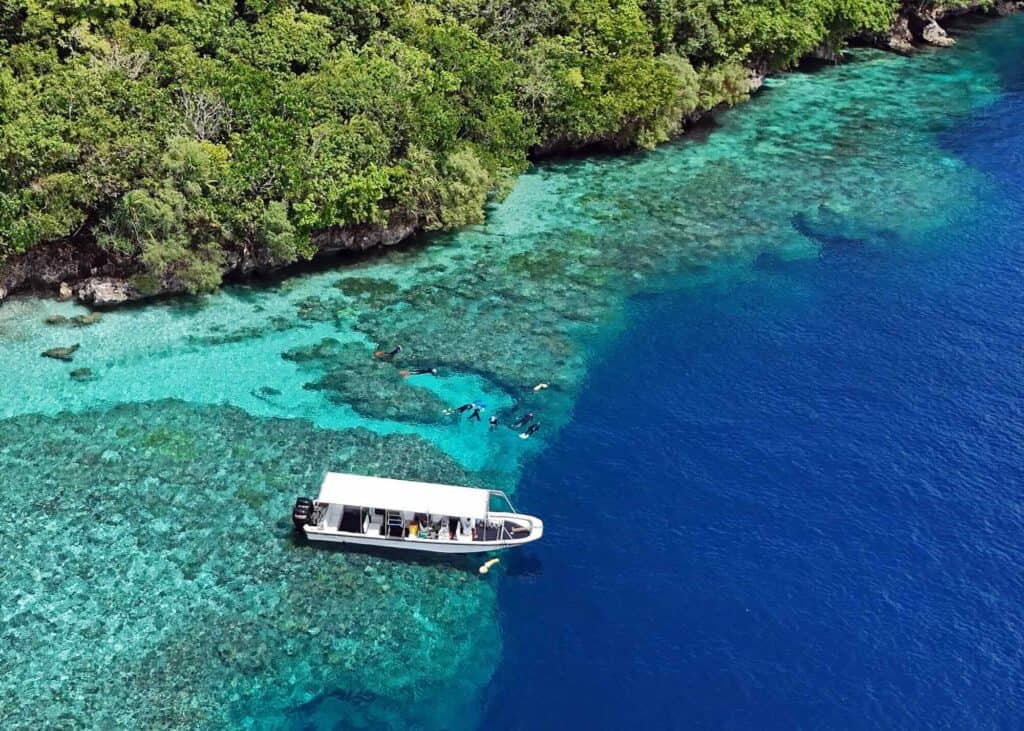
View Gallery: Stunning Photos Showcase Palau’s Amazing Reefs
Master Your Buoyancy
When diving, good buoyancy control is essential for capturing clear and stable shots. If you’re constantly kicking or floating unevenly, your images can be blurry, and you risk disturbing sand or marine life.
Practice smooth, controlled breathing and movements with slow fin kicks to maintain a steady hover to frame your subjects carefully. Proper buoyancy not only improves your photography but also protects the fragile underwater environment.
→ Pro Tip: Use a slight exhale to descend gently and a slow inhale to rise. Think of your breath as a natural buoyancy control tool. This helps you hover effortlessly and keeps the reef undisturbed while composing your shot.
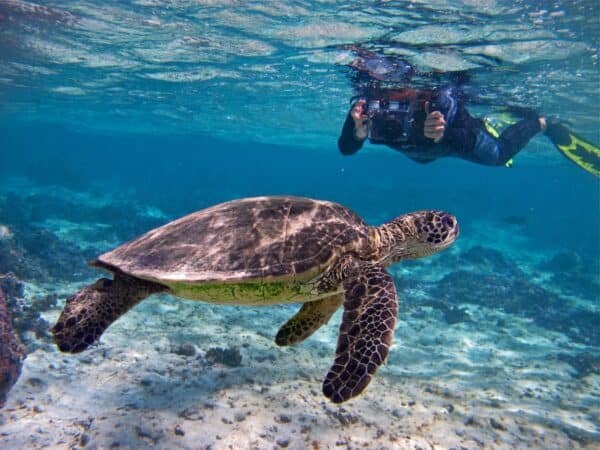

Wayne Sentman
Focus on Composition
Underwater photography follows many of the same composition rules as land photography. Use the “Rule of Thirds”, leading lines, or natural frames created by coral, rocks, or rays of sunlight. Negative space can also emphasize the subject and create a sense of scale.
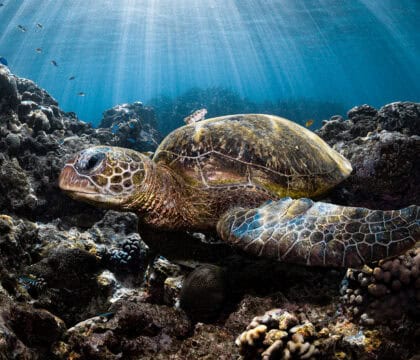
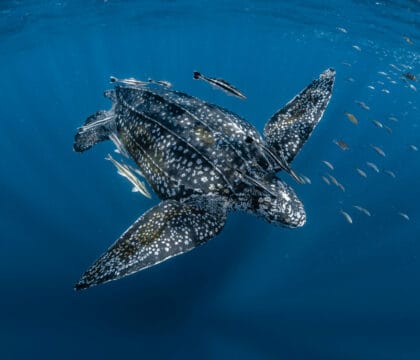
Consider how your subject interacts with its surroundings—capturing a fish weaving through coral or a turtle gliding past a sunbeam can add depth and storytelling to your photo. Experiment with angles and perspectives to make your shots more dynamic.
Instead of placing your subject in the center of the frame, which typically results in a flat, uninteresting composition, consider placing the subject off-center in accordance with the Rule of Thirds. Simply imagine the frame is a 3×3 grid and place your subject and other interesting elements around the four intersecting points (see below). This technique will make your composition more dynamic.
→ Pro Tip: Include elements in the foreground to create depth. When photographing schools of fish or turtles, try capturing them at an angle rather than straight-on to convey motion and scale.
Shoot Upwards
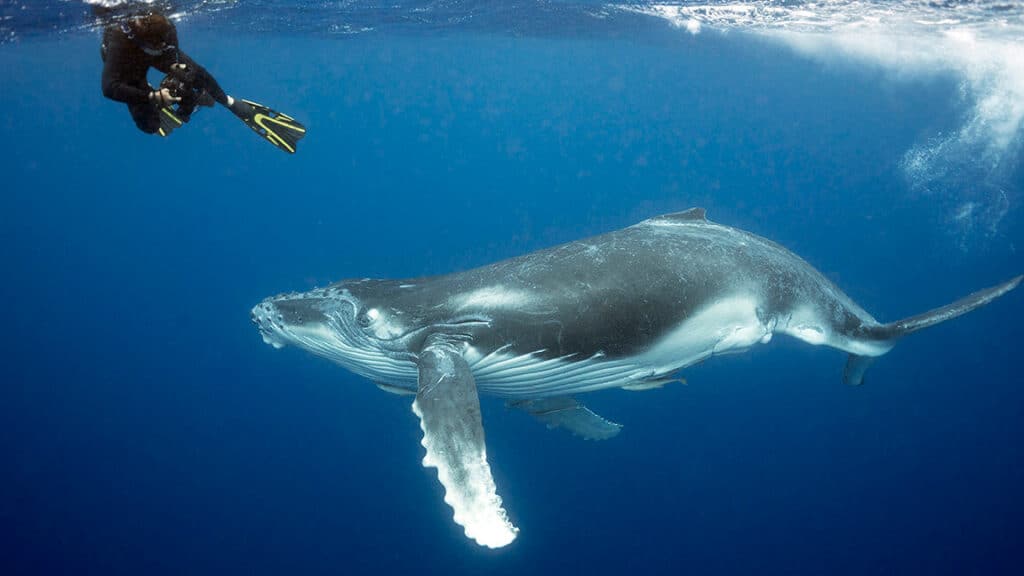
Shooting from below your subject can create a dramatic effect. Fish, turtles, or divers silhouetted against the sunlit surface can appear larger and more striking, while emphasizing depth and motion.
This angle also lets you capture light filtering through the water, giving your photos a three-dimensional feel. Just remember to adjust exposure to prevent overexposed highlights when shooting up toward the surface.
→ Pro Tip: Use the sun’s angle to your advantage! Shoot with the sun slightly off-center to create shafts of light that highlight your subject. Adjust exposure manually to avoid blown-out highlights on the surface.
Plan Your Adventure: The World’s Top 9 Snorkeling Destinations
Capture Motion
Underwater life is rarely still. Experiment with shutter speed and continuous shooting modes to either freeze action or convey movement. For example, a slower shutter speed creates a blur effect (like flowing fins or rising bubbles), while a faster shutter speed freezes a darting fish or a swimming turtle and may provide a clearer image.
Anticipate behavior by observing patterns before snapping a photo, and take multiple shots.
→ Pro Tip: Use continuous autofocus on your subject and track its movement by panning your camera. For schooling fish, this helps keep the main subject sharp while creating motion blur in the background.
Take Your Time
Much as in life, patience is critical. Some of the best shots come from waiting for the perfect alignment of subject, light, and background. Watch how fish or rays move, and when the moment aligns, be sure to take many shots to increase your chances of capturing the perfect moment. Oceanic Society naturalists often provide insight and guidance on studying subjects and understanding their behavior, helping you anticipate moments for the perfect shot.
Rushing can lead to blurry photos, missed opportunities, and stress on marine life. When you relax in the water, wildlife is more likely to approach, and slow, deliberate movements often result in more natural and captivating images.
Enhance Your Shots with Smart Editing
Even the best underwater photos often need a little post-processing to fully capture the vibrancy and clarity of the scene. Water absorbs light and colors, especially reds and yellows, leaving images looking muted or blue-green. Editing helps restore the natural tones and brings your photos to life.
Start with basic adjustments: increase contrast to add depth, tweak brightness for better exposure, and adjust color balance and levels to bring back lost reds and warm tones. Subtle sharpening can enhance fine details, like fish scales or coral textures, but be careful not to overdo it, as overly processed images can appear artificial.
For more advanced edits, there are specialized tools that make underwater photography easier:
- Adobe Lightroom – Great for color correction, contrast, exposure adjustments, and batch editing multiple shots.
- Adobe Photoshop – Ideal for more detailed edits, removing distractions, and fine-tuning sharpness and colors.
- Backscatter Underwater Image Editor – Designed specifically for underwater photography, with features to fix color shifts caused by depth and water conditions.
- Luminar Neo or ON1 Photo RAW – Offers AI-powered tools that can automatically enhance underwater images, including color restoration and clarity adjustments.
→ Pro Tip: Shoot in RAW whenever possible—it gives you maximum flexibility for recovering colors lost underwater.
Respect the Ocean
The most important rule is to protect the environment you’re photographing. Avoid touching or chasing marine life, never stand on or disturb coral, and follow local guidelines for responsible diving or snorkeling.
Great underwater photography is not just about the image; it’s about preserving the ocean for future adventures and the creatures that call it home. A mindful approach ensures both beautiful photos and a healthy marine ecosystem.
By following these tips, you’ll be ready to capture breathtaking underwater images that tell the story of life beneath the waves. Whether exploring shallow reefs or diving deeper into the blue, the ocean offers endless opportunities for unforgettable photography.
Ready to put your new skills into practice? Explore Oceanic Society’s small-group snorkeling trips and experience some of the world’s most vibrant marine environments firsthand.


Check Out Our Amazing Trips


Request a free travel catalog from Oceanic Society.
Get a free copy of our Expeditions Catalog by email or mail (in the U.S.) and start planning your next adventure!